Charting at Nourish
At Nourish, we utilize chart notes to document what occurs in session, record patient updates, and coordinate care with external providers. All charting occurs within your Nourish Provider Portal. To support your workflow, you also have access to the Nourish Scribe, an AI-powered tool that generates a session summary to help you chart more efficiently. The following sections will guide you through accessing, creating, and completing chart notes. Please review carefully so that you feel equipped going into your first session.
Overview
At Nourish, we utilize chart notes to document what occurs in session, record patient updates, and coordinate care with external providers. All charting occurs within your Nourish Provider Portal.
The following sections will guide you through accessing, creating, and completing chart notes. Please review carefully so that you feel equipped going into your first session.
Creating and Accessing Chart Notes
Nourish charting operates entirely within the Nourish Provider Portal. To create and access chart notes:
Navigate to the Home page of your Provider Portal, where appointments are sorted by date.
Create a chart note for the desired session by hovering over the chart note icon on the far right of the appointment line item and selecting "Create chart note".

If you have already started a chart note, the same icon will say "Open chart note". Simply click to access.
Once a chart note has been signed and locked, you will see a locked icon preventing further editing.
Chart Note Navigation
The chart note was designed by Nourish's Clinical team to maximize charting efficiency, improve clinical quality, and better organize information collected during session.
Each chart note has two sections:
Assessment & Diagnosis (focus of the initial session)
Intervention, Monitoring, & Diagnosis (focus of follow-up sessions)
The chart note follows the Nutrition Care Process to produce comprehensive documentation for clinical care as well as billing and compliance.
Chart Note AI Summary
At the beginning of both initial and follow-up sessions, the AI Summary feature will compile key patient information within the chart note. When you open a chart note for the first time, the system will begin generating a summary of the patient using their onboarding details or data from previous sessions. This process takes approximately 15-60 seconds, after which you can click “Read More” to view the full summary.
The purpose of this feature is to:
Provide RDs with a concise and actionable overview of patient history, goals, and progress.
Save time in preparing for initial and follow-up sessions, allowing RDs to focus on delivering personalized care.
Strengthen the patient-provider relationship by enabling dietitians to seamlessly pick up conversations and celebrate progress.
If you don’t see this feature, try refreshing your browser using Command-Shift-R (Mac) or Ctrl-Shift-R (Windows).
Chart Note AI Scribe
The Nourish Scribe is an AI-powered tool that generates a session summary from your Zoom recording to support faster, more focused charting. It allows you to stay present with your patient during the session without needing to take detailed notes in real time. Many dietitians report completing their charting in under 5 minutes when using the scribe, and find it helps reduce end-of-day documentation stress. You stay in control of what’s included in the chart — nothing is added automatically, and you can choose which parts of the summary to use.
Check out the video below for a demo, and click here for the Slack announcement!
Assessment & Diagnosis
Much of the information within the Assessment & Diagnosis section will be pre-populated from the patient's intake form. Review and supplement, as needed.
If a patient is transferring their care to Nourish from another platform in which the RD was previously seeing them, a comprehensive nutrition assessment must be documented.
Patient & Family Medical History: Captures relevant information about the patient's current and past medical history as well as family medical history.
For easy reference, patient information will be auto populated into this section when the patient completes the Nutrition and Lifestyle Assessment. Be sure to review this information with the patient during your session. If you decide to retain any information that was auto populated, enclose it in quotation marks to indicate it is a direct statement from the patient, otherwise, delete the text and replace with your documentation.
Lifestyle information, labs, other tests, and medication are captured later in the note and can be excluded here. A fully exhaustive list is unnecessary; include what you deem clinically relevant.
Smart Phrases can be very useful to keep this section organized.
Height, Weight, and BMI: Record height and weight during the initial session; BMI will be calculated automatically. Update weight as needed.
Weight History: If relevant, collect pertinent information on the patient's weight history prior to joining Nourish.
Energy Needs: The energy needs calculator is used to calculate macronutrient ranges for your patients.
The Mifflin-St Jeor equation is used to estimate an individual's basal metabolic rate (BMR).
You select an activity factor based on the patient's standards activity levels.
You have the ability to add (+) or subtract (-) calories based on weight gain or weight loss goals.
Energy, protein, carbs, and fat are then calculated off the adjusted number according to AMDR
Medications and Supplements: Selectable from a dropdown list gathered from the National Library of Medicine at the National Institute of Health (nlm.nih.gov).
To add a medication or supplement, select Add new, and enter the relevant information. You will need to find the medication by typing in the Name field, then add the relevant Dosage, Frequency, Start date, and End date (if the patient is no longer taking the medication), before selecting Save changes.
After saving, you will be able to edit the end date of the medication by selecting the three dots next to the medication, selecting Edit end date, and changing to the relevant date.
If you need to change frequency or dosage, you should re-add the same medication or supplement again, this time at the different frequency &/or dose.
If you are missing a relevant dosage or frequency, you can include the information in Other Patient Assessment field instead.
If you are unable to find the medication you're looking for, add it instead to the Other Patient Assessment field.
Lifestyle: Lifestyle data can be entered in the lifestyle free-text box.
Labs & Tests: To add a new lab or test entry, select Add new and a pop-up modal will appear. Select the relevant lab or test, add the value, and add the date of the lab or test (if unknown, select today's date). To see historical labs & tests, select the clock icon next to the header of the section.
Progress Questionnaires: To add a new progress questionnaire, select Add new, choose the questionnaire you want to complete, and answer the questions. View all historical questionnaires by selecting the clock icon.
Diagnoses: Nourish documents diagnoses using PES (Problem, Etiology, Signs/Symptoms) statements, a standardized format used in the Nutrition Care Process. Selections are from the 2024 eNCPT (electronic Nutrition Care Process Terminology) standardized language for the PES statement.
To add a new PES, select Add new within the section.
The Problem list is single select and and cannot be edited after the individual PES is saved.
The Etiology list is a dropdown based on your selection for Problem. It can always be edited in the future, but will be final on this particular chart note once signed and locked.
The Signs & Symptoms are multi-select based on a category, and you should add More details to better describe the specific situation of your patient. These fields can always be edited in the future, but will be final on this particular chart note once signed and locked.
You can see when any diagnoses (PES) were created, and you can also mark the diagnosis (PES) as resolved by selecting the three dots.
If a diagnosis is no longer relevant, delete it from the current note. It will remain in your past (historical) notes. In general, deleting a diagnosis should be very infrequent.
In most cases, a chart note should include a PES statement, particularly when follow-up appointments are scheduled, and interventions are being implemented to improve the patient's health, nutrition status, knowledge, or behaviors. However, a PES statement may not be necessary in the following situations. These exceptions should be clearly documented in the chart to ensure accurate and complete records.
The patient's nutrition problems have been resolved, and they are "graduating" from our care.
During an initial assessment, no nutrition problems are identified, and no follow-up appointments are planned.
Make sure to include adequate supporting evidence for your PES statement.
For example, if you use 'Lab work and tests - abnormal or worsening' as a sign/symptoms, specific numerical labs need to be documented in the chart. If you use 'Maladaptive eating patterns' as a sign/symptom, include what behaviors you are referring to and ensure they are documented in the chart.
Intervention, Monitoring, & Evaluation
You will be automatically routed to the Intervention, Monitoring, & Evaluation section when opening a follow-up session chart note.
Patient Update: Only include what was discussed in the specific session. It does not need to be exhaustive, rather, should be a short summary of key topics.
If there are updates to any of the patient's medical history, lifestyle, labs & tests, or anything else from the Assessment & Diagnosis, they should be made directly in those questions.
Previous patient updates can be viewed by selecting View all. Given the historical storing, do not leave past patient updates within the note.
Diet Recall: Record a recent diet history for the patient. If helpful, view past diet recalls by selecting View all.
Import patient meal log data from the Nourish app by selecting Import Logs.
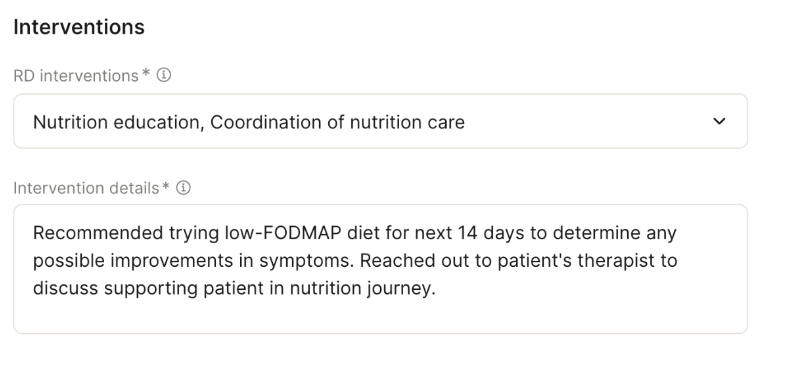
Interventions: Document what you did to resolve the nutrition diagnosis (PES). Nutrition interventions should directly address the nutrition diagnosis (PES). There are four possible intervention categories, and you can select more than one. After selecting, add details to the intervention(s) as shown below. (See attached pdf for sample interventions.) Intervention Details should not speak directly to the patient or simply be a list of short term goals, but rather focus on what the Dietitian provided to the patient in session.
Food and/or nutrient delivery
Nutrition education
Nutrition counseling
Coordination of nutrition care
Short-term goals: Short-term goals should outline how the patient will apply the nutrition interventions between now and the next follow-up session. Short-term goals are visible to the patient and can be edited and marked complete by both patients and dietitians. Short-term goals should align with the PES and intervention(s).
Long-term Goals: Long-term goals are not visible to the patient. Long-term goals are outcomes that you plan to support your patient on over the course of your work together and should align with the PES and intervention(s). Examples of long term goals include:
Adequate intake to meet needs and support health
Improvement or resolution of symptoms (insert symptom)
Compliance with nutrition plan of care
Better understanding of individual nutrition needs
Improved relationship with food or body
Improved lab value (insert specific lab)
Decreased physical activity
Increased physical activity
Slowed Weight Gain Velocity
Slowed Weight Loss Velocity
Weight Stabilization Weight Maintenance or Gradual weight lossFollow-up Plan: Indicate when you plan to see the patient next. This does not need to be exact, but the timeline should align with your recommendation.
Appointment Summary: Anything included in the appointment summary box will be e-mailed to the patient once the chart is signed and locked. Appointment summaries are email communications sent directly to patients and are required to sign and lock your chart note. Once you sign and lock your note, the appointment summary will automatically be emailed to the patient. These summaries should speak directly to the patient and include key discussion points and short-term goals covered during the session. To assist you, clicking Generate Summary will create an AI-generated draft of the summary. Be sure to carefully review it for accuracy before proceeding.
Example:
Hi [insert patient name],
It was so great meeting with you today! Here are the goals we discussed in session today:
[list goals]
I wanted to share a few quick reminders as well:
[insert reminders]
You’re doing an amazing job working toward your goals!
Your next appointment is [insert date]
Kind regards,"
Signing and Locking Chart Notes
Chart notes must be signed and locked within 48 hours.
Once you have completed your chart note, simply click Sign and Lock. Remember, appointment summary content will automatically be sent to the patient once the chart note is signed and locked, so be sure to review the appointment summary beforehand.
Patient Sidebar
The patient sidebar contains supplemental information you may wish to access easily while in session or while charting. Open the patient sidebar by selecting the icon on the right side of your chart note. Press the same button (relocated to the bottom of the sidebar) to collapse the sidebar.
At the top of the patient side bar, you can see the date of the next scheduled session and easily access message history. Further detail can be opened within the following sections:
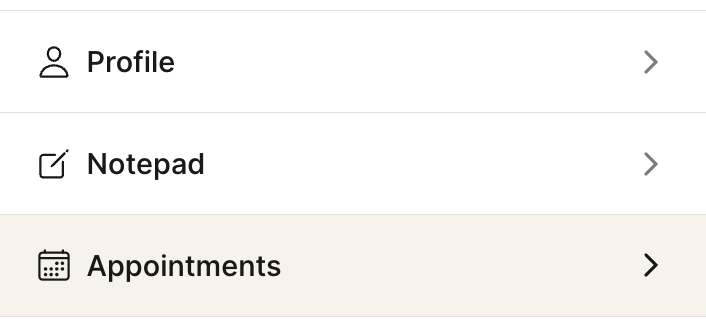
Profile: View personal information, contact information, tags, conditions, and sign-up and referral details.
Notepad: A place to record any information not captured within the chart note(s). Use this to keep track of key details about the patient's life, upcoming events, or reminders about what to discuss in future sessions. Notepad content is not shared with the patient nor external providers.
Appointments: View appointment history, upcoming scheduled sessions, and access historical chart notes.
Insurance: View insurance information and past claim statuses.
To-do list: View all active, completed, and deleted to-dos; a more extensive history than what is shown within the chart note.
Outcomes: View all historical outcomes (excluding data from current chart notes), such as lifestyle data, labs & tests, and progress questionnaires.
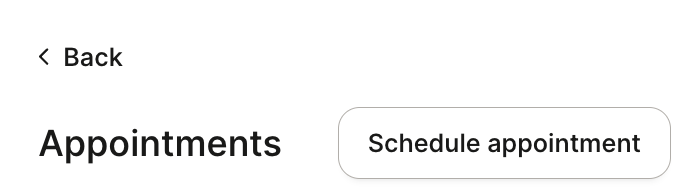
Scheduling Appointments from the Chart Note
To schedule an appointment directly from your chart note, simply click the Appointments section in the patient sidebar of the chart note. Then, click Schedule Appointment. This will bring up a modal, and the default date will pre-populate as one week from the date of the chart note appointment, though you're welcome to change that to whatever date you wish.