Setting up your Nourish Calendar
We're excited to share that with our newly launched internal calendar, you can now set availability, select scheduling preferences, and book sessions directly within your Provider Portal! Follow the steps below to complete your calendar setup and explore how to use its features.
Please note:
You can have multiple tabs of the provider portal open, allowing you to navigate between the calendar and other features within the provider portal seamlessly.
Access your Nourish Calendar
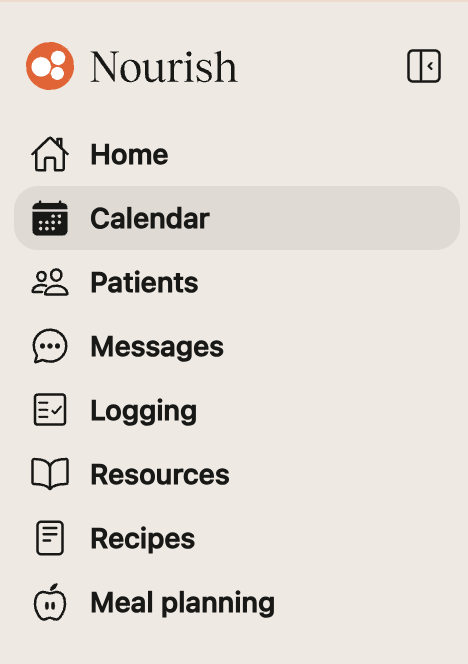
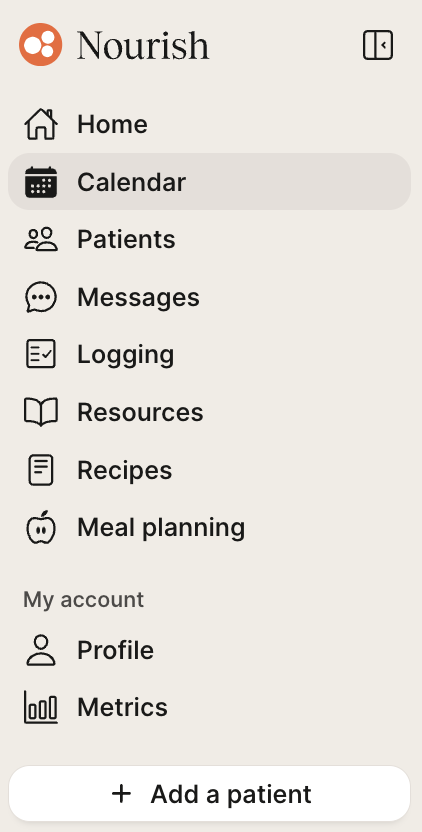
To access your Nourish calendar, log into the Provider Portal using your Nourish Gmail and the temporary password sent there. Once logged in, navigate to your calendar by clicking "Calendar" within the left hand side bar.
Access your Nourish Calendar on your Mobile Device
Go to app.usenourish.com/classic on your phone and log in (you may need to give the page a refresh after logging in)
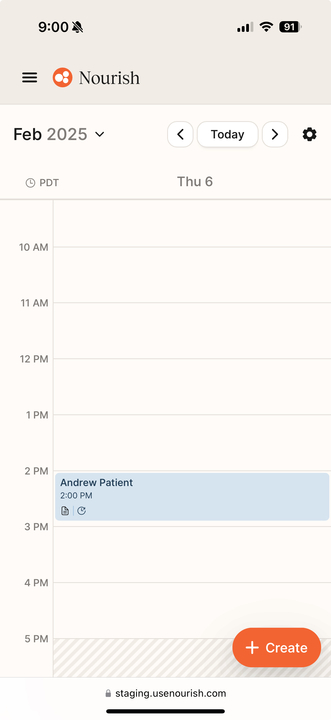
Navigate to the Calendar – you’ll now see one day at a time, and you can tap the arrows at the top to move between days
Tap the date at the top left to jump to a different day
You can create, view, and edit appointments and blocks
You can also manage your availability and caseload
Heads up! The calendar and its settings work great on mobile now, but other parts of the app might still work best on desktop (for now!)
Navigating your Calendar
The top banner of your calendar shows the current month and year, your selected time zone, and the date you're viewing. It also includes the "+ Create" button for adding appointments or blocks, a filter for adjusting views, and calendar settings.
Date: To view a different date, click the month in the top-left corner and choose the desired date or week. To quickly return to today’s date, click "Today" in the top-right corner of the calendar. You can also navigate one week back using the left arrow next to "Today" or jump forward one week with the right arrow.
Timezone: To set your time zone, click the drop-down arrow and select your preferred option. Your calendar will automatically adjust to reflect the new time zone. When scheduling with patients in different time zones, you can switch to their time zone to make scheduling easier, then switch back to your own afterwards.
"+ Create" button: Click this to add blocks or appointments to your calendar. Instructions for setting your availability and scheduling sessions are below.
Filter: Here you can hide patient names, which is helpful if you screen-share when scheduling follow-up sessions with patients. When hiding names to screen-share with patients, be sure to stop sharing your screen before you schedule the appointment, as other patient names will still be visible in the patient dropdown selection. You can also filter by appointment status to hide canceled and/or no-show/late cancel appointments.
Calendar Settings: Within calendar settings, you can select schedule management preferences, customize your availability, and sync an external calendar, if desired. Follow the steps below to complete your calendar settings.
Set up your calendar
Click the gear icon at the top right of your calendar banner to navigate to the Calendar Settings page. Here, you will set your schedule management preferences and working hours.
1. Schedule Management
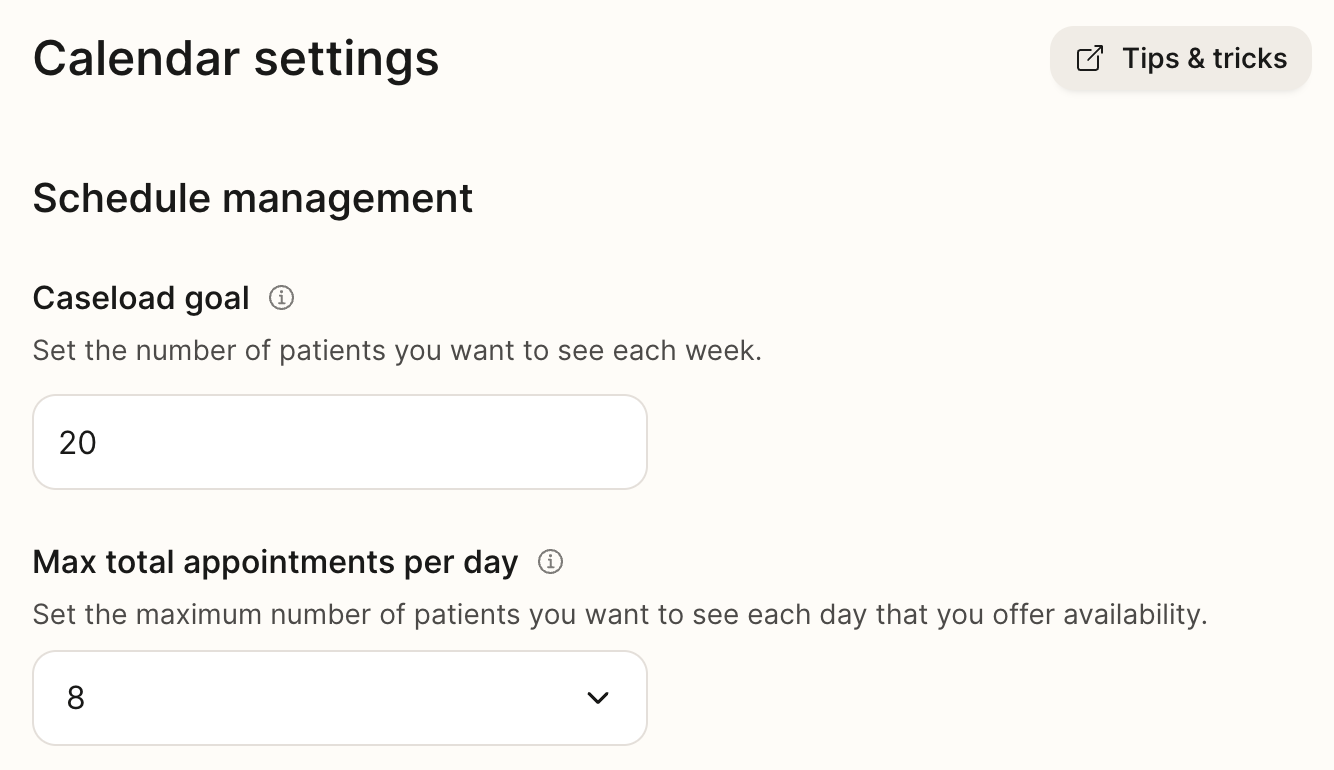
Caseload Goal: Set the number of sessions you wish to hold each week.
Please note: We may schedule 1-2 sessions above your caseload goal each week to account for cancellations and no shows.
Max total appointments per day: Maximum number of both initial and follow-up sessions you want to be scheduled in a single day.
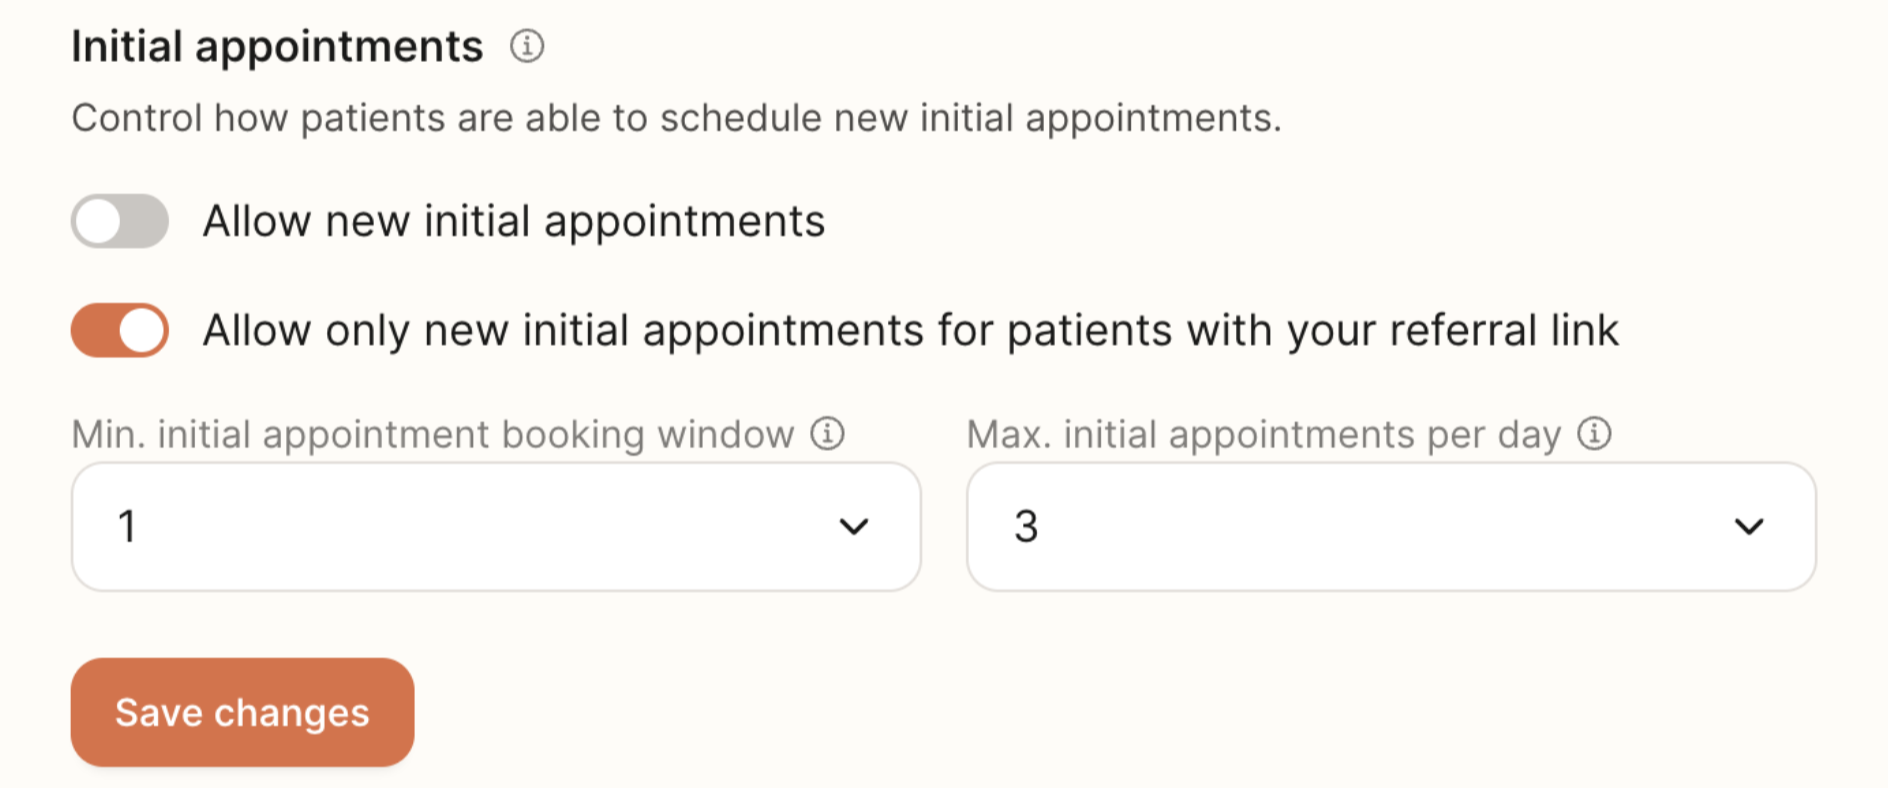
Allow new initial appointments: As a new provider, your initial appointment setting will be pre-set to allow new initial appointments. As your caseload grows, if you wish to temporarily pause initial sessions from being scheduled, simply toggle this off.
Allow only new initial appointments for patients with your referral link: With this setting, you can block initial appointments from Nourish-sourced patients, while still allowing those who visit your profile via your unique referral link in our provider directory to see and book any available time slots on your calendar.
Minimum initial appointment booking window: Select your desired booking window for initial sessions. "0" allows initial sessions to be scheduled up to 2 hours in advance. "1" allows next-day initial sessions.
Maximum initial appointments per day: Select the maximum number of initial sessions you wish to be scheduled in a single day.
Be sure to click the orange "Save Changes" button to save your selections!
2. Availability
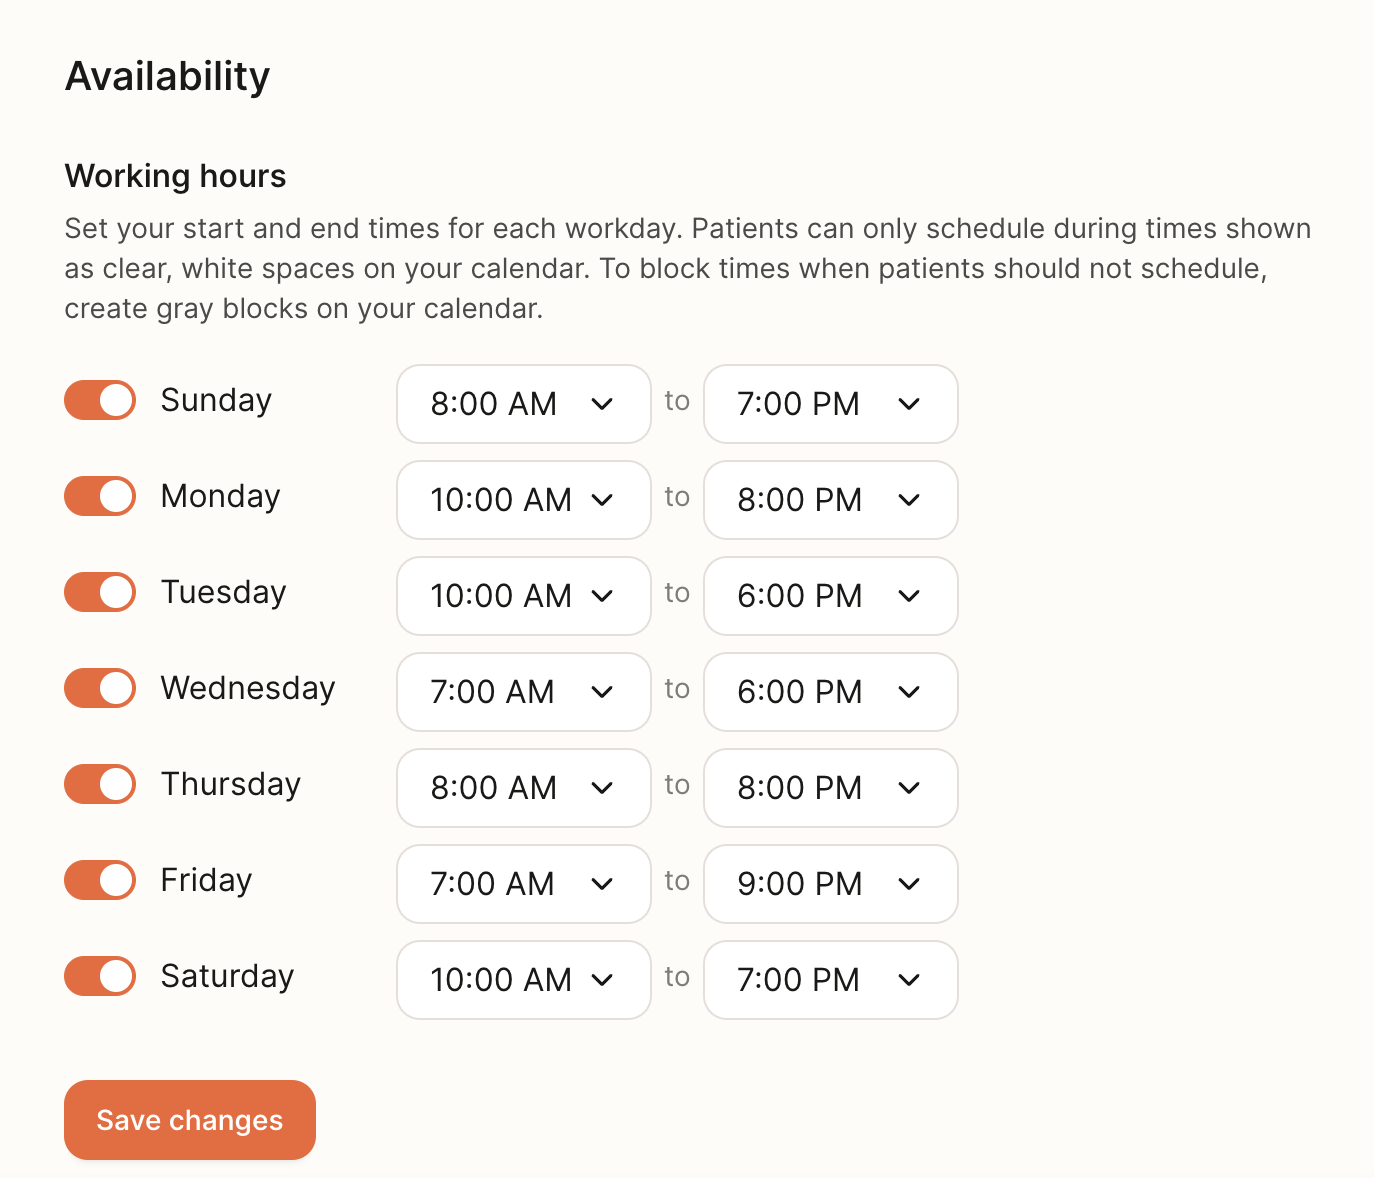
Set your desired start and end times for each day. Think of this as your default working hours. In the next step, you can set blocks to cover times within these windows that you are unavailable to see patients. You do not need to be available during the full window, rather, these times should reflect when you intend to start and end working each day.
Please note: Be sure you have availability that exceeds your caseload goal! Best practice is to have sufficient availability to allow for 20% more scheduled appointments than your desired caseload goal due to cancels/no shows. Providers with the most consistent schedules typically have 50%+ more availability than their caseload goal. For example, if your goal is to have 20 appointments per week, you should have 30+ hours of availability and 24 appointments scheduled for the week. Patients also tend to schedule more with providers who have increased availability, as it gives them more options when scheduling.
Please note: While you can schedule follow-up sessions to begin at any time, initial sessions will be scheduled to begin only at the top of the hour. Given this, we recommend that your start hours begin at the top of the hour as well to maximize availability. Both initial and follow-up sessions are scheduled for 55-minutes.
Be sure to click the orange "Save Changes" button to save your availability!
3. Add blocks when you are unavailable to see patients
The final step in setting your availability is to add blocks to your calendar to reflect times you do not wish to see patients. Sessions will not be scheduled during times that are blocked on your calendar.
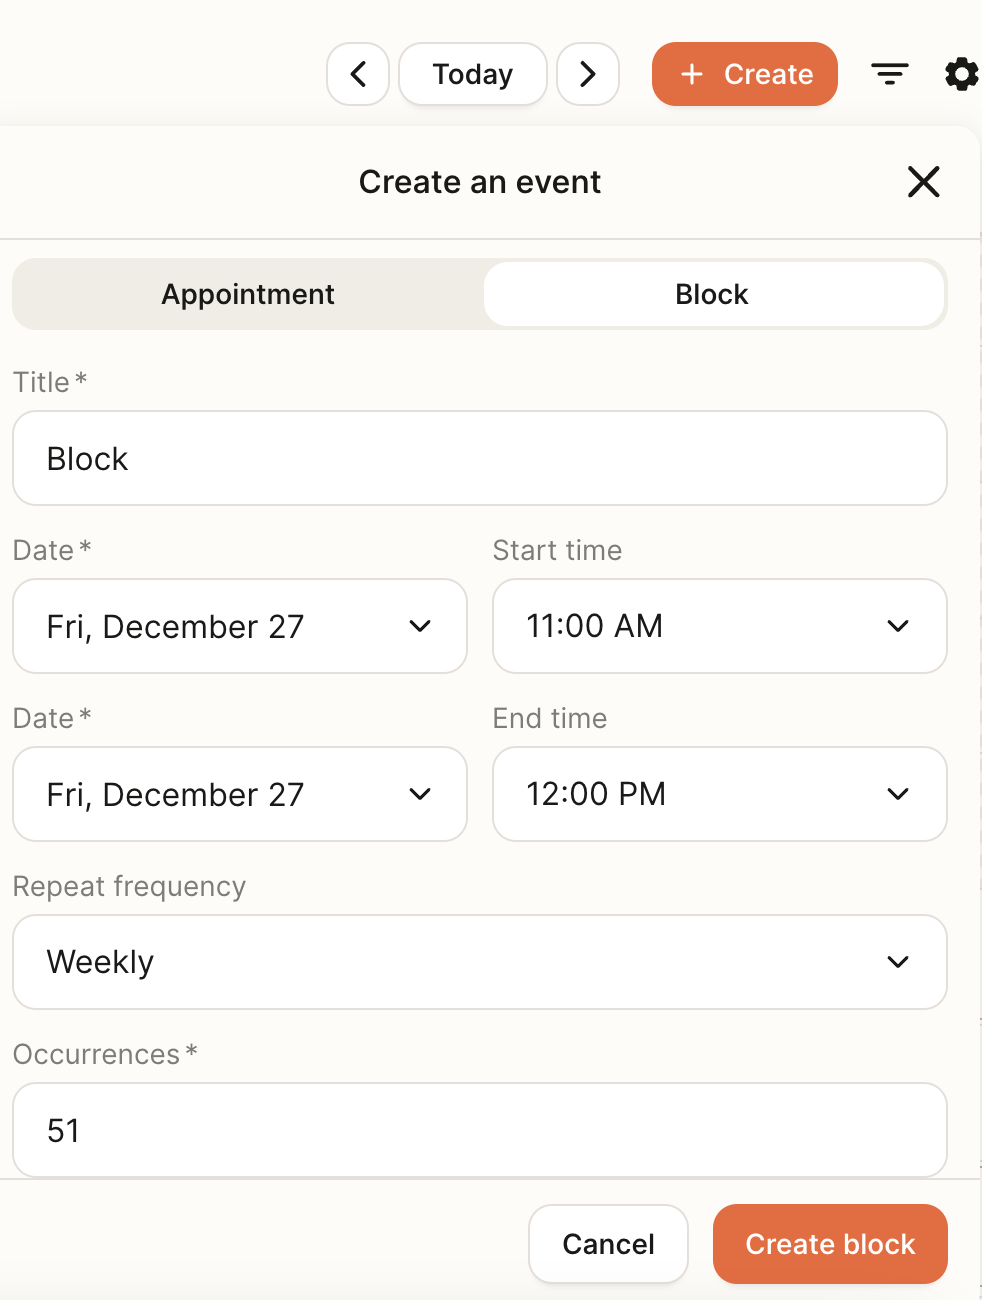
To add a block, navigate back to the Calendar by clicking "Calendar". Click the orange "+ Create" button and select "Block". Here, you can title the block, select the date, start, and end time, and designate a repeat frequency and occurrence interval, if desired. The example below shows how you would schedule a one hour lunch break on every Friday.
Please note: Patients can book up to 4 weeks ahead, so be sure to set your current availability for at least the next month. Availability can be changed at any time.
4. Confirm availability
Once you have finished adding blocks to cover all times you are unavailable to see patients, confirm your availability is accurately reflected.
Patients can only schedule during times shown as clear, white spaces on your calendar, not during gray blocked times or times outside your working hours with gray slants.
Scheduling Appointments
The majority of initial appointments will be scheduled for you, as patients are matched with a provider and schedule their initial session via our online sign-up flow.
You are expected to schedule follow-up appointments while in session with your patients. Best practice is to schedule weekly, recurring sessions for at least the first 4 weeks, ideally 8 weeks.
Both follow-up and initial sessions can be scheduled directly from your Nourish calendar.
Scheduling Follow-up Sessions:
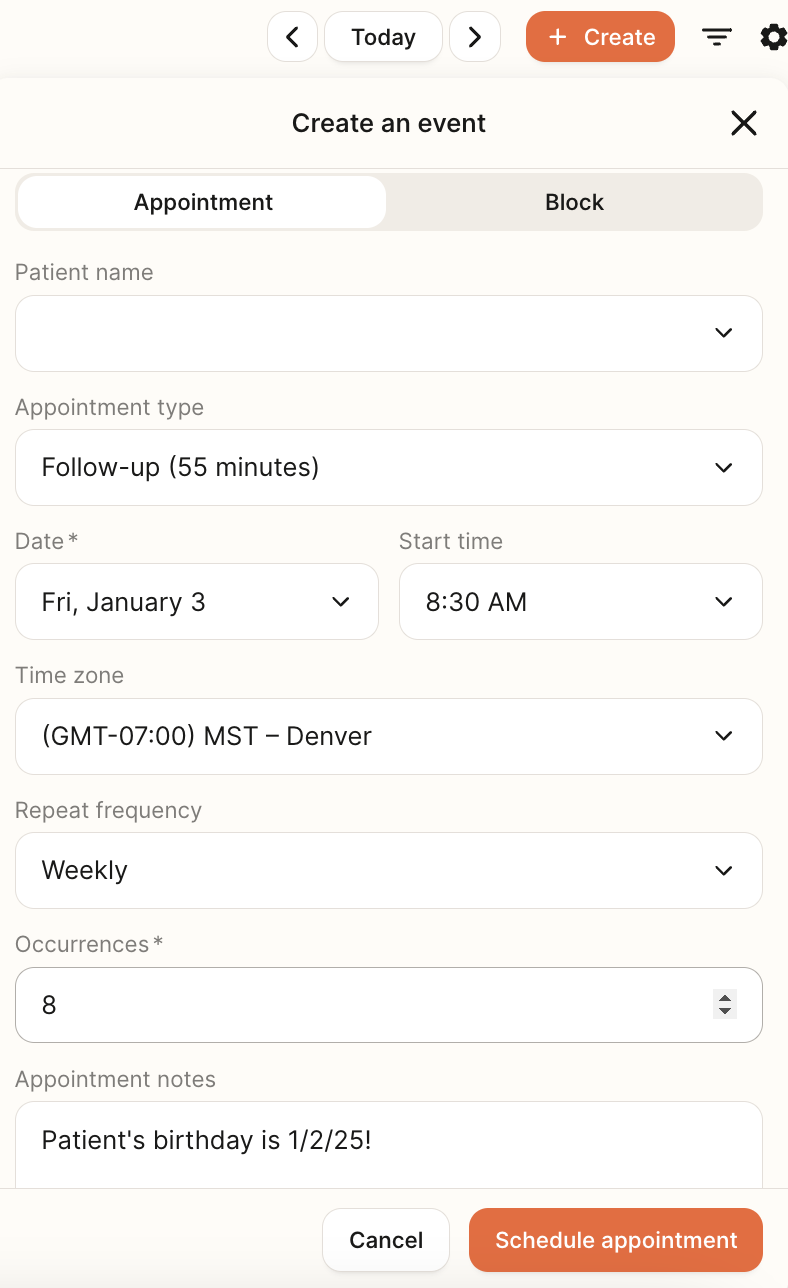
Create an appointment by clicking the orange "+ Create” button at the top right hand corner, or by simply clicking the desired time slot on your calendar. Ensure "Appointment" is selected. Select the patient name from the drop-down, and ensure appointment type is set to "Follow-up (55 minutes)". Select the intended date and start time, and ensure the appropriate timezone is reflected. If desired, set the repeat frequency and occurrence interval. Best practice is to schedule weekly, recurring sessions for at least the first 4 weeks, ideally 8 weeks. You can also add appointment notes as helpful reminders. Appointment notes are separate from chart notes and are not visible to patients.
Scheduling Initial Sessions:
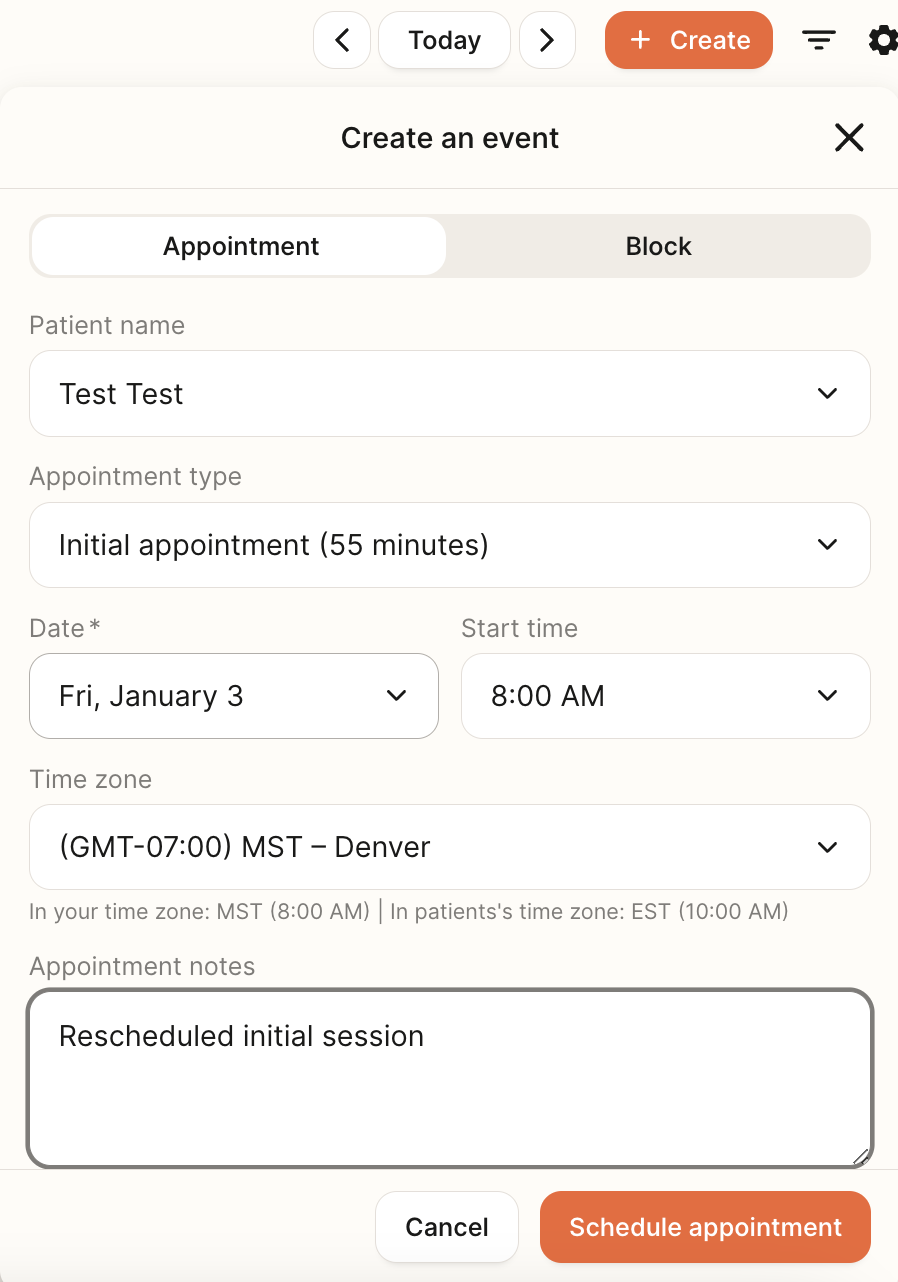
In order to schedule an initial session within your Nourish calendar directly, the patient must have already created a Nourish Patient Portal account (meaning, they've gone through the sign-up flow already and had scheduled an initial session). The limited use case for scheduling an initial session from the Nourish calendar directly would be if a patient had scheduled an initial, cancelled or no-showed, and then messaged you to reschedule.
In this instance, you can schedule the initial session by clicking the orange "+ Create” button at the top right hand corner. Ensure "Appointment" is selected. Select the patient name from the drop-down, and ensure appointment type is set to "Initial appointment (55 minutes)". Select the intended date and start time, and ensure the appropriate timezone is reflected. You can also add appointment notes as helpful reminders. Appointment notes are separate from chart notes.
To schedule an initial session with a patient who has not yet signed up with Nourish, you can add the patient directly from your Provider Portal. Simply click the "Add a Patient" button in the left-side banner and fill out the information in the corresponding pop-up to schedule. The patient will then be sent an email invitation to create their Patient Portal account.
Scheduling Appointments from the Chart Note
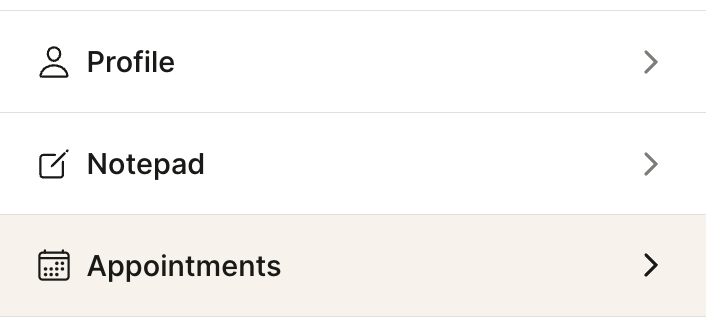
To schedule an appointment directly from your chart note, simply click the Appointments section in the patient sidebar of the chart note. Then, click Schedule Appointment. This will bring up a modal, and the default date will pre-populate as one week from the date of the chart note appointment, though you're welcome to change that to whatever date you wish.
Edit appointments
To edit an existing appointment, simply click into the appointment. Within, you can view appointment details, patient contact information, and your appointment notes. Click the pencil icon to edit appointment details, including the date, start time, time zone, recurrence settings, and appointment notes.
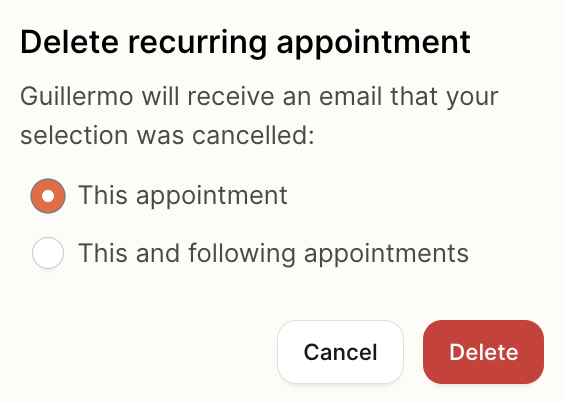
To delete an existing appointment, simply click the trash can icon within the appointment. If the appointment is part of a recurring series, you will be shown a pop-up confirming the cancellation for either the specific appointment, or that appointment and all others in the recurring series. Patients will receive an email informing them of the cancellation.
Appointment Features / Navigation
Patient messaging: Click the message bubble to access the Provider Portal's messaging feature, allowing you to communicate directly with your patient.
Create / Open Chart Note: Enables you to create a new chart note, or edit the existing chart note, directly from the appointment box.
Set Status: Here, you can set appointment status. Appointment status must be updated, and the chart note signed and locked, within 48 hours after the session.
Appointment Status Definitions:
Scheduled: The appointment has been set, but has not yet occurred.
Occurred: The appointment has occurred. Record the join time and appointment duration.
Cancelled: The appointment has been cancelled by either the patient or the RD. Please be sure to put in the cancellation reason within the note section.
No-Show/Late Cancel: Indicates that the patient either missed the appointment or canceled less than 24 hours before the scheduled start time. Be sure to record an explanation within the note section. For more information on our no-show/cancellation policy, please review the no show/cancellation policy training.
Appointment color-coding:
Light pink = initial appointment
Light blue = follow up appointment
Gray = block (patients will not be able to schedule with you)
White = cancelled session or no show
Access Your Patients' Unique Link:
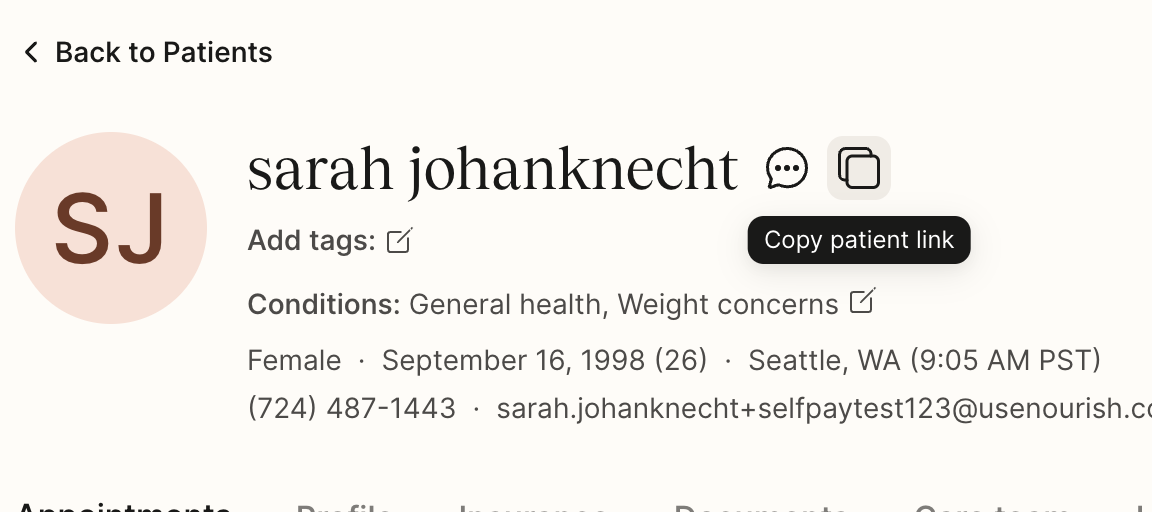
Use your patients' unique link when communicating with our CX team (at support@usenourish.com), so that patient data can easily be located and to minimize sharing patient names. To access your patients' unique link, simply click their appointment on your calendar, then click the Copy patient link icon shown in the screenshot of a test patient below!
Sync an External Calendar (Optional)
Please note: It can take up to 24 hours for synced events to populate on external calendars.
If desired, you can sync your @usenourish.com Google Cal to the Nourish Calendar within your Provider Portal. This is entirely optional. Doing so will allow you to:
Bring external events into your Nourish Calendar within your Provider Portal (such as the Nourish Group Calendar, or a personal calendar you synced with your @usenourish Google Cal). External events will only show as "busy" - appointment details will not carry over.
Push sessions to appear on external calendars (your @usenourish.com Google Cal, or personal calendars synced to your @usenourish Google Cal). Sessions will appear on external calendars as "busy" - appointment details will not carry over to comply with HIPAA regulations.
View your Nourish calendar on to go, via the mobile Google Cal app.
Syncing a personal calendar to your @usenourish.com Google Cal:
If you'd like to sync a personal calendar with your Nourish calendars, you will first need to sync the personal calendar to your @usenourish.com Google Cal, then sync your @usenourish.com Google Cal to the Nourish Calendar within your Provider Portal. This is entirely optional; your personal calendar does not need to be synced in order for your @usenourish.com calendar to be synced with your Nourish Calendar in your Portal.
To sync a personal calendar to your @usenourish.com Google Cal, open your @usenourish.com Google Cal in a separate tab, then click the gear icon at the top right to open your Calendar Settings Menu. Click "Settings" -> "Add Calendar" -> "Subscribe to Calendar". Under "Add Calendar", type in the email address associated with your personal calendar and click "Request Access" in the following pop-up. An email will then be sent to your personal email for you to approve access. Once approved, your personal calendar will be listed as a sub-calendar within your @usenourish.com Google Cal. Below is a brief video demo and a screenshot of the access request email.
Adding the Nourish Group Calendar to your @usenourish.com Google Cal:
The Nourish Group Calendar contains invitations to all company-wide meetings (All Hands), clinical quality meetings (Case Review & Collaborations, guest speakers, etc.) and new hire support (New Hire Kickoff Call) You may wish to add the Nourish Group Calendar to your @usenourish.com Google Cal, so that when you sync your @usenourish.com Google Cal to your Nourish Calendar within your Provider Portal, the Nourish Group Calendar meetings show as "busy". This is entirely optional; the Nourish Group Calendar does not need to be added in order for your @usenourish.com calendar to be synced with your Nourish Calendar in your Portal.
To add the Nourish Group Calendar to your @usenourish.com Google Cal, access the Nourish Group calendar here (you must be logged into your Nourish Gmail when doing so). Then, at the bottom left hand corner select "Add to google calendar" (as shown below). The calendar should then appear within your @usenourish.com calendar!
Syncing your @usenourish.com Google Cal to your Nourish Calendar
Only your @usenourish.com Google Cal can be synced with your Nourish Calendar in your Provider Portal. If you'd like, you can follow the instructions above to sync a personal calendar and/or add the Nourish Group Calendar to your @usenourish.com, so that those calendar items then sync to your Nourish Calendar in your Provider Portal.
To sync your @usenourish.com Google Cal, navigate to the Calendar Settings page within your Provider Portal. Scroll down to External Calendars. Under Google Cal, click "Connect". Read the pop-up thoroughly, then click "Connect your Calendar". Select your @usenourish.com Google Cal (non-Nourish calendars cannot be synced), and click "Continue" to initiate the sync.
Syncing an Apple Calendar to your Nourish Calendar
While you can sync an external Apple Calendar to your Nourish Calendar, please be aware that it is only possible for your Nourish Calendar events to "push" to your Apple Calendar. Unfortunately, external limitations do not allow for events on your Apple Calendar to be pulled into your Nourish Calendar.
To sync your Apple Calendar to your Nourish Calendar, open iCal on your computer. Select File > New Calendar Subscription. You will then be prompted to enter the URL found on the Calendar Settings page of your Provider Portal. Once the URL pasted, select Subscribe. You will then be prompted to enter a name for this Calendar (we recommend "Nourish Calendar").
As a reminder, the iCal sync is 1-Way, which means appointments in Nourish will show up as events in iCal, but iCal events will not show up in your Nourish Calendar.
Disconnecting your @usenourish.com Google Cal from your Nourish Calendar
If you wish to disconnect your @usenourish.com Google Cal from your Nourish Calendar, you can do so directly from the Calendar Settings page within your Provider Portal. Scroll down to Scroll down to External Calendars. Under Google Cal, click "Disconnect". Read the pop-up thoroughly, then click "Disconnect" again.
The following pop-up will confirm the disconnect was successful and will prompt you to delete your Nourish Calendar from your @usenourish.com Google Cal. Doing so is critical to ensure that no out of date events are still synced to your @usenourish.com Google Cal.
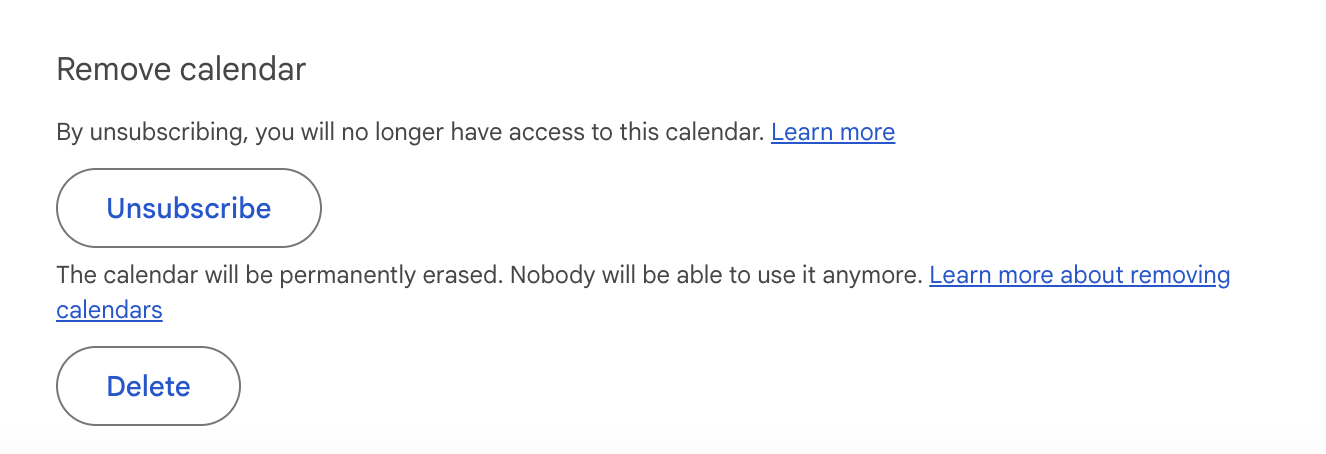
To delete your Nourish Calendar from your @usenourish.com Google Cal, open your @usenourish.com Google Cal in a separate tab, then scroll down to view My Calendars on the left-side banner. Click the three dots next to the "Nourish" calendar, then click Settings and Sharing. Scroll to the bottom of the Nourish calendar settings page and click Delete -> Permanently Delete under Remove Calendar. After deleting, your "Nourish" calendar should no longer be visible under My Calendars.
Syncing Nourish Appointments to a Personal Calendar
If you would like to sync your Nourish appointments to a personal calendar please do the following. First, you'll need to ensure that you've set up nourish appointments to write to your usenourish.com google calendar. This can be toggled in the Nourish portal calendar settings page:
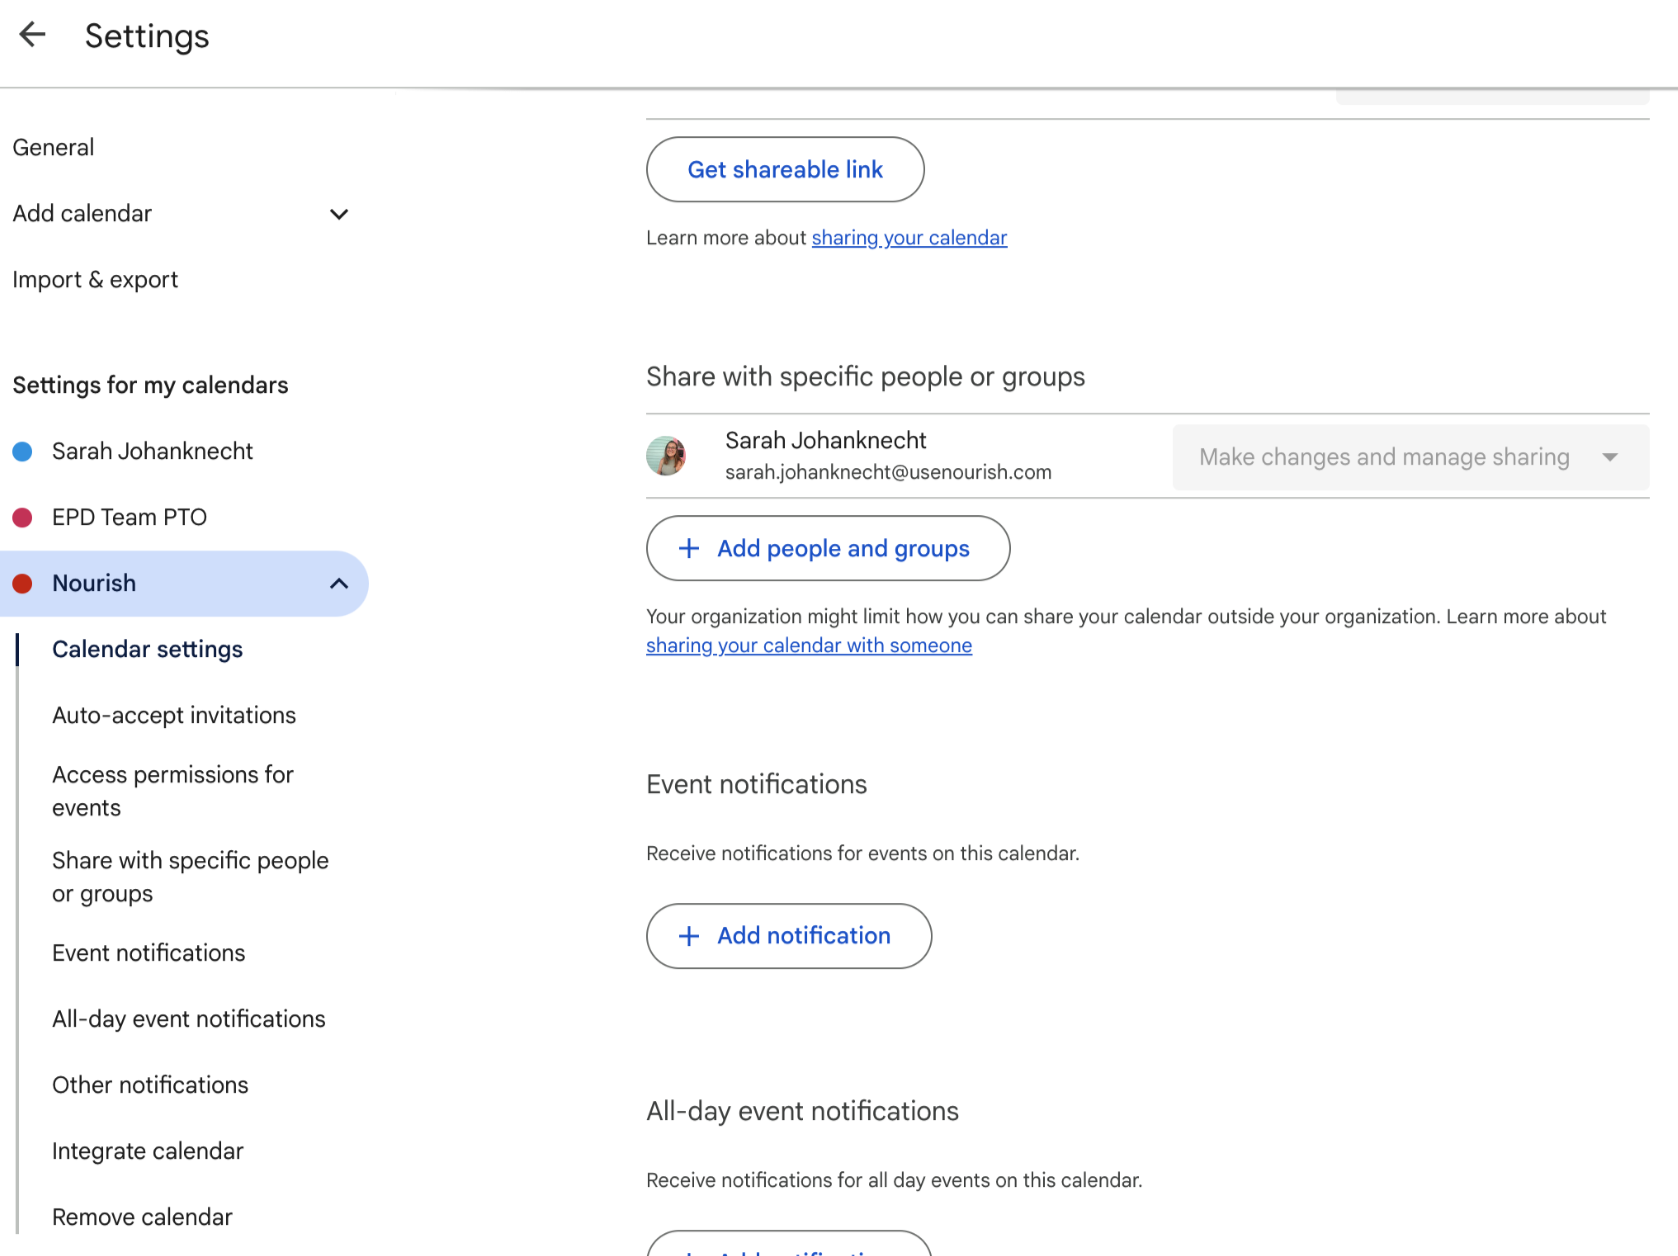
Then, you'll want to navigate to the settings page in your usenourish.com Google Calendar, select the Nourish calendar under Settings from my calendar. Lastly, under "share with specific people or groups," you will want to add your personal gmail account.

